Reviewed by PRO MAX HVAC & Appliance Repair technicians, EPA 608 certified
A garbage disposal leaking from the bottom almost always has a failed internal seal, and the fix is a new disposal, not a repair. Leaks from the top or the side are a different story. Those usually come from the sink flange, a drain gasket or the dishwasher hose clamp, and they can often be fixed in an afternoon. So the first job is finding exactly where the water starts.
Do it soon. The U.S. EPA's WaterSense program estimates that household leaks can waste nearly 10,000 gallons of water a year in an average home, and a slow drip under a sink also soaks the cabinet floor. In a lot of 1970s tract kitchens around Rancho Cordova, that floor is particleboard, and it swells and crumbles once it stays wet.
Cut the Power First
Turn off the wall switch for the disposal, then unplug it under the sink or switch off its breaker. Water and the disposal's motor wiring sit inches apart, and a bottom leak means water may already be inside the motor housing.
Put a shallow pan or a towel under the disposal while you work.
Find Where the Water Starts
Leaks travel. Water that starts at the top flange can run down the outside of the disposal and drip off the bottom, which looks like a bottom leak but is not. So test before you decide.
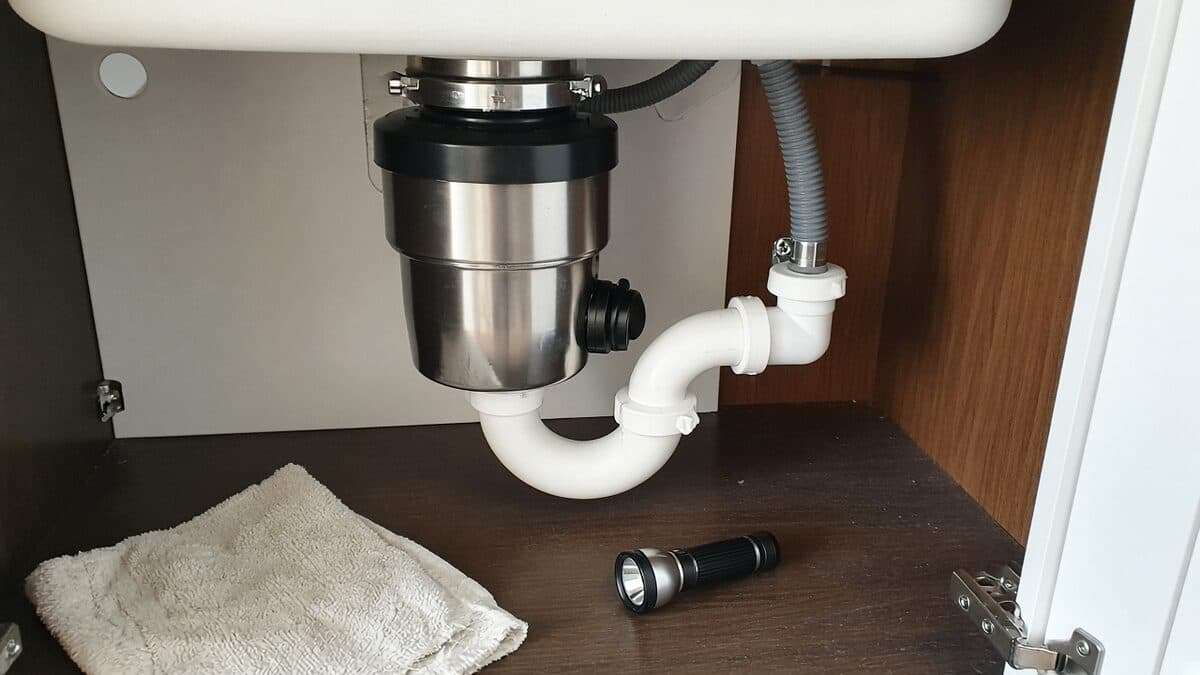
Wipe the disposal, the sink flange, the drain pipe and the dishwasher hose completely dry. Plug the sink, fill it a few inches with water, and add a few drops of food coloring. Pull the plug and let it drain through the disposal. Then use a flashlight and a dry paper towel to find where the colored water first shows up.
You will land on one of three places: the top, the side or the bottom.
Leaking From the Top
A leak at the top comes from the sink flange, the metal ring in the sink drain that the disposal hangs from. The flange is sealed to the sink with plumber's putty, and that putty dries out and cracks over the years. Vibration can also loosen the mounting ring underneath.
Start by checking the mounting ring. On many disposals you can tighten it by turning the lower ring with the small wrench that came with the disposal, or with a screwdriver in the mounting lugs. If tightening does not stop it, the flange has to come out, get cleaned, and go back in with fresh putty. That means taking the disposal off the mount. It is a manageable job for a handy homeowner, and a quick one for a plumber or appliance tech.
Leaking From the Side
Side leaks come from one of two connections. The drain pipe connects to the side of the disposal with a gasket and a flange held by bolts, and that gasket flattens over time. Snugging the bolts or replacing the gasket usually fixes it.
The other side connection is the dishwasher inlet. Your dishwasher drains through a hose clamped to a small nipple on the disposal. If you only see water when the dishwasher drains, that clamp is loose or the end of the hose has cracked. Tighten the clamp, or cut off the cracked end and reclamp it if there is enough slack. A split hose gets replaced.
Leaking From the Bottom or the Reset Button
Water from the bottom of the disposal, or from around the red reset button, means water is getting past the internal seals into the motor housing. Sometimes the grinding chamber itself has cracked, often from something hard like a fruit pit, glass or a dropped spoon.
That cannot be fixed from the outside. Tightening the screws on the bottom plate does not seal it, and manufacturers do not sell those internal seals as a homeowner repair. Leave the power off, keep a pan under it, and plan on a new disposal. Running a disposal with water inside the motor housing is how a leak becomes an electrical problem.
While you are shopping, check the U.S. Consumer Product Safety Commission site for recalls on your current model. If it was recalled, the manufacturer may cover the replacement.
When to Call a Pro
Call a technician when the leak is at the bottom or the reset button, when you see corrosion or burn marks near the electrical cord, or when the cabinet floor is already soft. Also call if the top flange keeps leaking after you tighten the mounting ring, since resealing it means removing and remounting the disposal and reconnecting the drain and dishwasher lines.
Our position: fix top and side leaks, because a little putty, a new gasket or a tighter clamp solves them for a few dollars. Replace a disposal that leaks from the bottom, because no amount of tightening will stop it, and it only gets worse.
A typical call for this, especially as holiday cooking ramps up, starts with a towel under the sink that keeps getting wet. The colored-water test takes ten minutes and tells you which of these three jobs you have.
PRO MAX HVAC & Appliance Repair handles garbage disposal replacement and dishwasher repair across the Sacramento area. Call us at (916) 234-5925 or book a visit online on our contact page.
How to find where a garbage disposal is leaking
Cut the power
Turn off the disposal's wall switch and unplug it under the sink or switch off its breaker before you put your hands near it.
Dry everything
Wipe the disposal, the sink flange, the drain pipe and the dishwasher hose completely dry with a towel.
Add colored water
Plug the sink, fill it a few inches with water and a few drops of food coloring, then pull the plug and let it drain through the disposal.
Watch where it appears
Use a flashlight and a dry paper towel to find where the colored water first shows up: the top flange, the side connections or the bottom.
Test the dishwasher connection
If nothing leaked, run a short dishwasher drain and check the hose clamp on the side of the disposal.
Sources
Need appliance repair in the Sacramento area?
Same-day service, 180-day warranty, all major brands. PRO MAX HVAC & Appliance Repair — Carmichael, CA.